Starting out as a Music Producer? Expect exciting times ahead! Here is a quick tip: Keep it simple. Start with a basic setup in your bedroom as your bedroom studio.
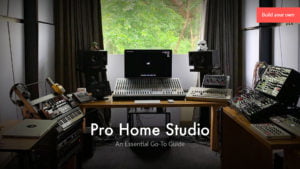
A Studio is one’s workspace that may or may not be acoustically treated. A dedicated space to set up and store equipment; or a makeshift space where you are practising your art form.
What are the main steps to consider while building your own Bedroom studio?
1. Purpose
2. Space and Location
3. Acoustics and Treatment
4. Furniture
5. Gear and studio Equipment
6. placement
STEPS TO BUILDING YOUR BEDROOM STUDIO
Understand the Purpose
A bedroom studio has very basic requirements to produce music. The purpose here is to set up an inexpensive workspace, solely with the intention of writing down music into your DAW.
Space and Location:
Ideally, a “Bedroom Studio” would be in your “Bedroom”. The workspace here would be a work-desk with the basic gear on it. If you have a choice, choose your room as isolated as possible; especially if you are living with others, like noisy flatmates or siblings. Additionally, choose a room that is away from external noise, like busy roads or crowded parks. Plan to produce at night? Choose a room to isolate sound to avoid disturbing others.
Acoustic Treatment:
Ideally one would not really need to treat a bedroom. If you plan to play loud music or mix and master your own tracks, some basic treatment would help. Some well-positioned Acoustic foam pads could do the trick.

As a rule “Don’t crank up the bass on your tracks”. Restricting the bass from leaking into the rest of the house is difficult even with professional treatment, so listen quietly. Live in a condominium and have neighbours under your bedroom, like most people do today? It is a good idea to use a thick rug or carpet under your work area, if not the whole bedroom. Place sound diffusers on the ceiling, over your speakers. Use Heavy or thick curtains for windows, they are great for sound absorption.
Furniture:
Bedroom furniture is great to dampen sound. Stick to Wood when possible, for its absorption and dampening capabilities. Remember, soft rough surfaces work better than hard, shiny, polished surfaces.
– Beds have a lot of soft materials. Great for dampening and absorbing sound. A mattress, comforters or duvets, pillows, bed covers, etc are all good.
– Wardrobes help with absorption and dampening. Avoid metal and plastic wardrobes. Woollens, cotton and other clothing materials in the wardrobes are welcome additions.
– A work desk to place your gear which will be the focus of the bedroom studio. Position this to face the bed or wardrobe and not the doors or windows.
– Add-ons: Throw rugs, bolsters, throw cushions, and a couch, all make great additions to the bedroom studio. Great for sound absorption and reducing the bass frequencies.
– Go green: add some plants to help with that natural feel and keep those studio toxins in check.

Gear:
A computer, basic audio interface, studio Monitors and possibly some midi to help you along the way, is all you will need to start out. A microphone is a handy addition for your studio in case you plan to record an instrument or your voice. (for more details, check out: Start-up Guide to Music Production)
Placement:
The best way to arrange a studio is to start with a blank slate. Clear out all the furniture and then start afresh. Plan the placement of furniture and equipment to ensure you get the least external disturbance and disturb others the least. Most importantly, speaker placement is imperative. Try facing them away from inner doors and outer windows. Your sweet spot can be between the work-table and your bed or wardrobe. The bed and wardrobe absorb the maximum frequencies. If you are placing speakers directly on your table, try to use isolation pads below them.
Isolation pads help control unnecessary vibrations coming off your speakers from messing with your audio interface or any other gear.
Now that you know how to get started, just start producing music and roll out those bangers. Truth be told, you don’t need an expensive studio to produce great music.
Start with the basics and grow your studio as you grow as an artist in the Industry.
Need help with your productions? We have the place to get you started.
Check out cool studio Accessories to bring some life to your studio at oddshop.in


