A Professional Recording Studio is a space that has been acoustically treated to Record, Produce, Engineer, Mix and Master audio. In addition, it has the necessary gear and audio equipment. It may have space separately: a small to record a single instrument or a large space for a full orchestra.
A Professional Recording Studio
When setting up a Professional Studio, it is a good idea to work with an acoustics professional who has the knowledge and experience. Additionally, an architect who specialises in music studios would be an asset. Studio Construction is a highly specialised field and the materials used can be expensive. A DIY approach is not recommended. However, it’s a good idea to look at local materials that are easily available to bring down costs.
1. Purpose
2. Space and Location
3. Acoustics and Treatment
4. Furniture Placement
5. Gear and Equipment placement
BUILDING A PROFESSIONAL RECORDING STUDIO
STEPS TO BUILDING A PROFESSIONAL RECORDING STUDIO
- Purpose:
A Professional Recording studio is a commercial space, where people can record, produce, mix and master their tracks.
Recording studios are often rented out to multiple users or artist. Some private studios are owned by record labels and used by their own artists. Whatever the case, it is a good practice to have one’s own engineers and technicians, man the studio equipment. This avoids unnecessary wear and tear or misuse. Large Commercial recording studios have pre-approved lists of engineering, some even on retainer for such purposes.
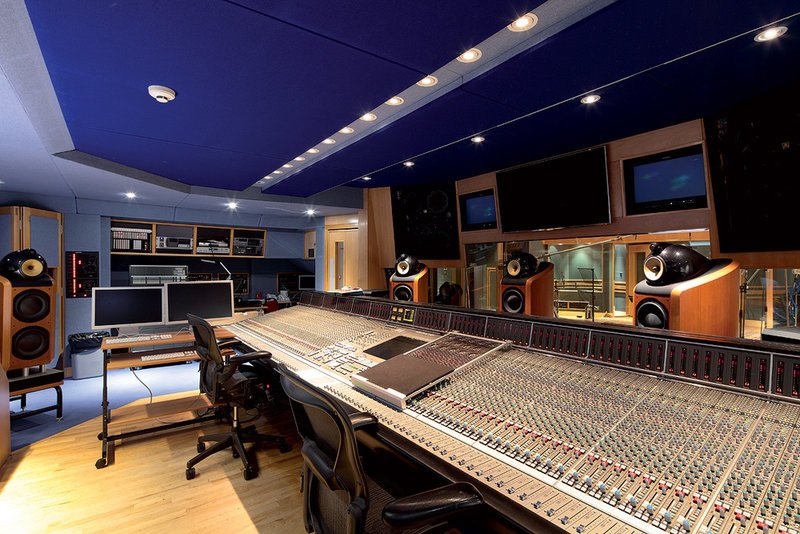
Image: Abbey Road Studios - Space and Location
A Recording Studio has multiple acoustically treated rooms laid out so that sound from one space does not leak into another. The best are constructed from the ground up. They achieve soundproofing within its space from internal and external sounds. Studios incorporate High Ceiling, Suspended floors and no Parallel walls.
A Recording Studio should have a control room and a separate recording booth (at the minimum). Some have more extensive and specialised spaces including defined recording spaces like a vocal booth, drum room, instrument recording rooms and may even go as far as having a separate mix and master studio, foley rooms, dubbing suites, and Audio Visual editing studio’s, based on the kind of work undertaken. Often, walls are not shared and have air-gaps or corridors to reduce the transfer of sound from one room to another.
Common additions like any commercial or office space today include reception and administrative or back-office spaces, a pantry and breakout spaces for artists and engineers. Isolate Audio Spaces from these common areas.
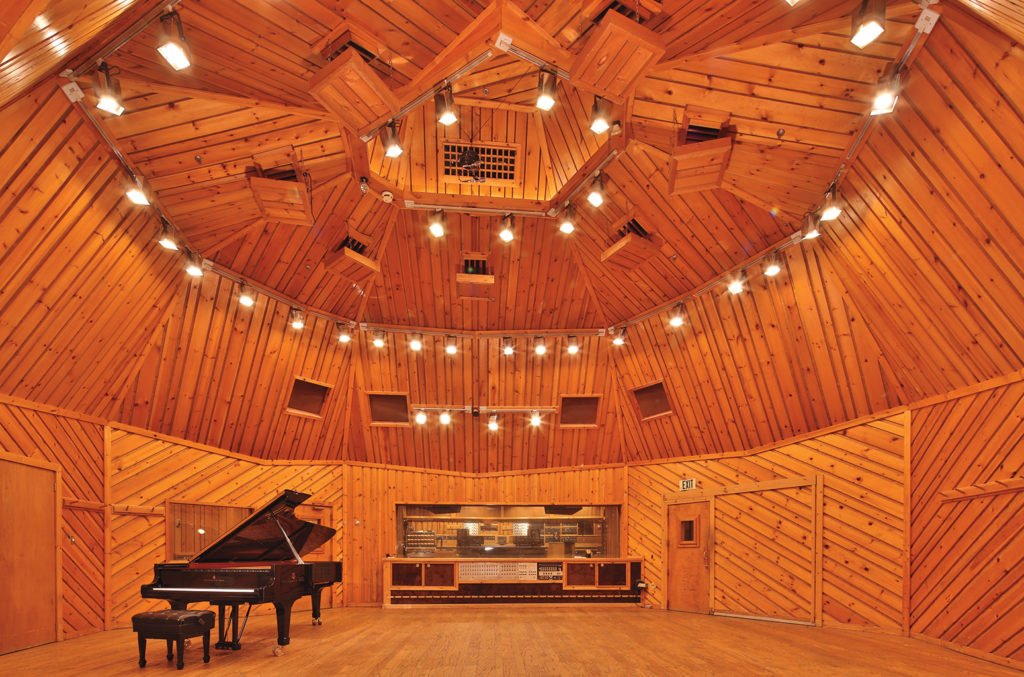
Image : The Power Station - Acoustic Treatment:
Depending on the location, consider building-in a fair amount of acoustic treatment to get your room sounding right. Extensive treatment is required for a Professional Recording Studio to avoid leaks and great sound.
a) Walls:
The external walls of the studio are normally concrete, the structure is solid and drowns out any external sound. In general, studio walls are highly dense avoiding any possible vibrations from leaking in.
Construct Internal walls with a frame structure of wood. Use Drywall finishing stuffed with an insulation like Rockwool or fibre-glass. Soundproofing drywall is a bit more expensive but makes a great sound barrier using multiple layers of steel and gypsum board increasing the wall density.
Please note: Rockwool and fibreglass are both harmful and care is needed when handling them. Eye protection, gloves and a face mask are advisable.
b) Ceiling:
Studio ceiling has acoustic tiles either for absorption or diffusion which help with soundproofing and improving the acoustics of the studio. They can either be attached directly to the ceiling or better suspended on a T-bar grid system. Acoustic tiles vary by design, composition and finishes.
Use sprayed polyurethane foam for Sound isolation on walls and ceiling. Filling wall voids, the foam curbs resonance, keeping the sound from leaving or entering the desired room or space. Sprayed foam can also reduce sounds generated inside wall spaces, caused by flushing toilets, clanging pipes, and other miscellaneous utilities.
It is a good idea to check safety norms before applying as the material is highly flammable and cause irritation due to its toxicity at the time of application, but becomes inert once cured.
c) Floors:
A well-constructed Recording studio has a suspended or floating floor, building on the idea of a room within a room. The idea is to isolate the surface of the studio or recording room from external sounds and vibrations. Use resilient channels or u-boats to achieve this. Fill pockets or gaps, with insulation materials to dampen and absorb sounds generated in the room. Floor finishings include wood, carpet or floor mats. Add Acoustic vinyl and carpet or foam under-liners for better floor isolation.
- Furniture and Fixtures:
Studio Furniture has come a long way. From traditional hand made tables preferred by most to the modern modular tables that can be customised as required, the options are endless. What important are the following:
1. The Workdesk
The centre of every studio, the studio desk is where you place a lot of the gear. Some prefer to fit equipment into the desk like a studio mixer and then organise all the other gear around it, while others prefer a flat top allowing easy upgrade and changes in gear. Organise your studio desk. Ensure adequate space to house all the gear you use and more, for future expansion. Built-in racks for easy access of rack-mounted gear can be on the desk or under. The computer, its screen, a keyboard and mouse all need space. A keyboard tray makes for an efficient add-on to the desk.
2. The Chair
A considerable amount of time is spent here. A chair needs to be as comfortable as possible to ensure you can work for long hours, especially without hurting yourself. Choose a chair that is ergonomic. Additionally, the chair adds to the look and the feel of the studio, so make sure it looks good.
3. Audio Rack
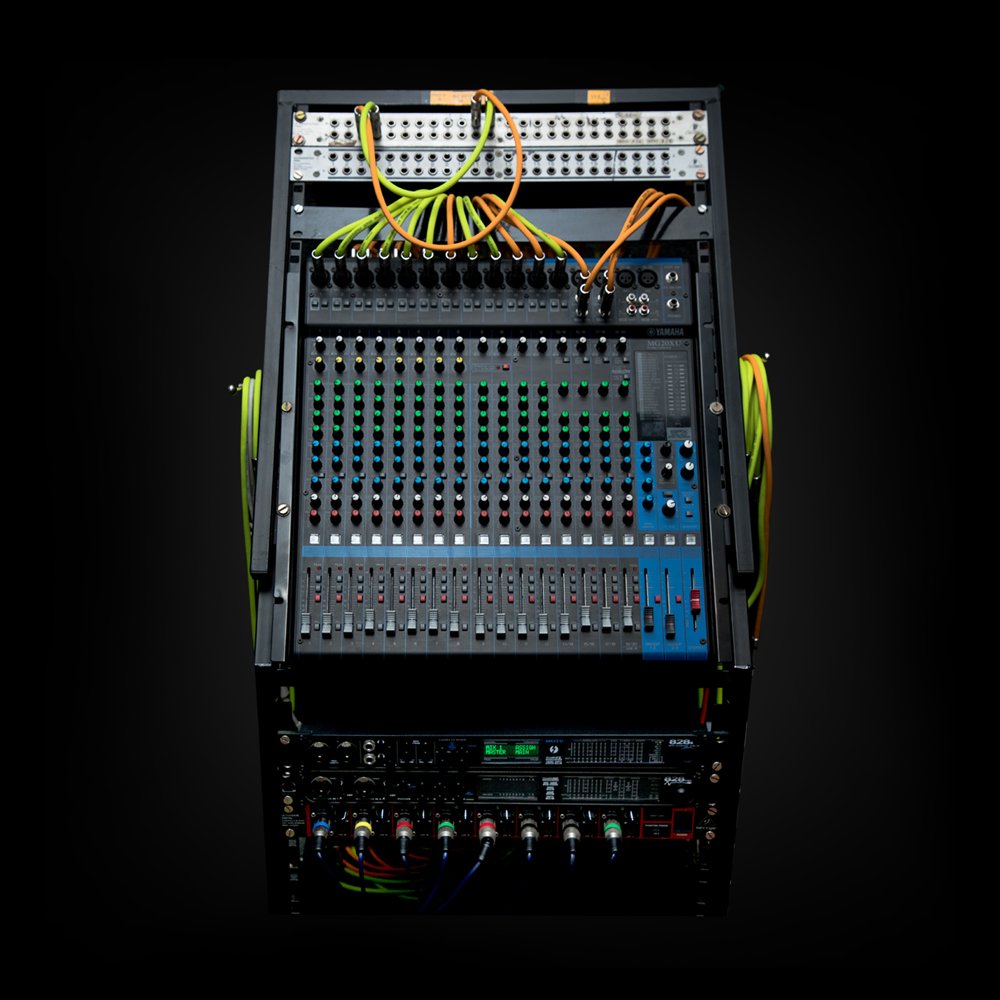
Most studios will have one eventually, as studio engineers love their outboard gear. The rack can house the audio interface, pre-amps, equalisers, processors, effects processors, patch bays, and any other rack-mountable gear you can think of.
Where Power is not consistent, like in India; protect your gear. Consider adding rack-mountable power conditioning. Surge protectors, power switches and even a rack UPS.
4. Airconditioning:
Silent Split Air-conditioners are the way to go. Ensure the vents don’t point directly where the Microphones are positioned in the recording room.
Once you have set up your studio you may still need to correct or enhance the acoustics. These can be done using high-frequency absorbers and low-frequency absorbers. - Gear and Equipment:
A Computer to process sound with DAW
A powerful Computer with adequate processing power and internal storage. Ensure the OS supports the DAW plugins and other software you plan to use. For Powerful DAW dedicated for recording like Pro-tools consider an assembled PC. While Apple Logic Pro is Mac-based and should have the latest Apple tech available.
Audio Interface
Absolutely essential in Computer-based audio productions, an Audio Interface is the connect from analogue to digital for audio. It converts analogue signals from a microphone or input device to data that a computer can understand and converts back digital to analogue to be heard through the studio monitors. The ideal interface is one which can boost the right amount of signal and improve the audio quality. The High-end interface will give accurate control and possibly allow level enhancements to signals as well, improving clarity.
Microphones
A Microphone is an acoustic-to-electrical transducer. It converts sound in air into an electrical signal. Essential for a recording studio, the microphone come in various types based on the purpose of its use, i.e the subject being recording. Having different polar patterns for recording, when paired with the right instrument the recording can often sound better than the original. The 3 Main Types of Microphones are:
Dynamic
Condensor
Ribbon
Monitor and Stands
Studio monitors are (speakers) designed for professional audio production applications. They come in different sizes. Consider them based on the size of the room as well as the purpose of use. It is important to choose a speaker with great clarity so that you can hear the intricacies of your composition and the quality of your mix – good or bad. Some of the popular brands we would recommend are Adams, Dyna-audio, Presonus, Kali and of course the hardy Yahama HS series which would make for great starter monitors for any studio.
Most studios have at least 2 sets of monitors for referencing: near field & mid-field studio monitors. However, if you are mixing for video and need 5.1 surround mixes; Far-field-monitoring is required. Far-field monitors require a considerable amount of space. The point of origin of the sound, i.e the monitor needs to be at least 10 feet away from the listener.
Near-Field Monitors are small speakers with small cones. They range from 3 inches up to 8 inches and comprise of mainly a tweeter and a mid speaker. Anything Larger would be a Mid Field, though Mid-field usually has two cones apart from the tweeter. While Far-field has multiple speaker cones to split lows, mid’s and high frequencies.
Studio Monitors can be placed on the Work desks directly using isolation pads. They sound better, placed on height-adjustable stands separate from the word desk. This avoids unnecessary vibrations from being picked up by the mixer or other devices on the studio desk.
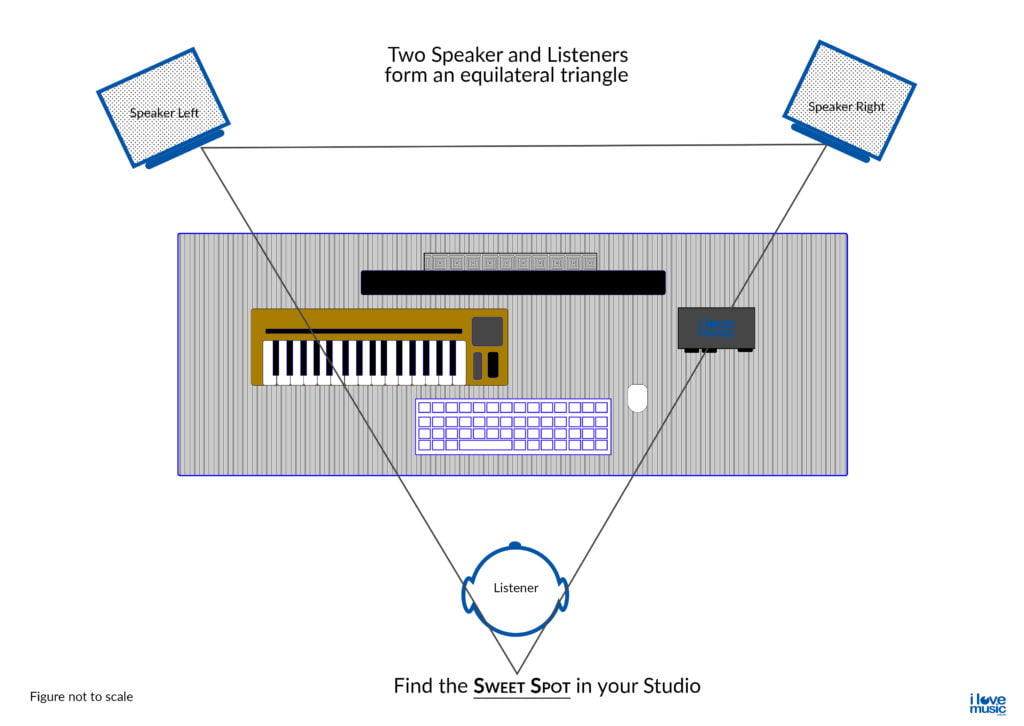
Position Speakers to enable the right sweet-spot by forming an equilateral triangle between the two speakers and the listener.
The Business of Commercial Recording Studio’s
The Commercial Recording Studio is a professional environment used to record, produce, mix or master in an acoustically correct environment. It costs a lot to set up and operate. Therefore, it must be managed like a business in itself. No environment is 100% acoustically sound. Even if it is technically absolute, it may not necessarily sound right to every individual. Ensure, each space is built keeping in mind the purpose and what it is best suited for.
Operating a commercial studio requires management of resources and time, and needs professionals to ensure utilisation and equipment is taken care of. The better built and better equipped, the more one can earn or charge from it. Charges are per hour for use of the space with additional charges for engineers.
Footnotes:
Image: Abbey Road Studios
Originally built in 1829, Abbey Road Studios was nothing more than a 9-bedroom house which was later bought by the Gramophone Company in 1928. This world’s first-ever purpose-built pro studio. Later it merged with the Columbia Gramophone Company in 1931 to create Electrical and Musical Industries later to be known as EMI Studios.
Image: The Power Station
Producer Tony Bongiovi opened the Power Station in 1977 which became a go-to for hitmakers such as John Lennon, David Bowie, Bruce Springsteen, Madonna and a band led by the owner’s nephew, Jon Bon Jovi.

